Setting Up SMTP for Sending Email via Office 365 in Your Homelab
Intro
When I first set up my homelab, I didn't want to deal with hosting a mail server, so I opted for Office 365. However, I ran into some trouble when trying to set up SMTP for sending email through a service I was hosting. If you're facing the same issue, here’s what you need to do to configure SMTP in Office 365:
- Log in to the Exchange Admin Panel
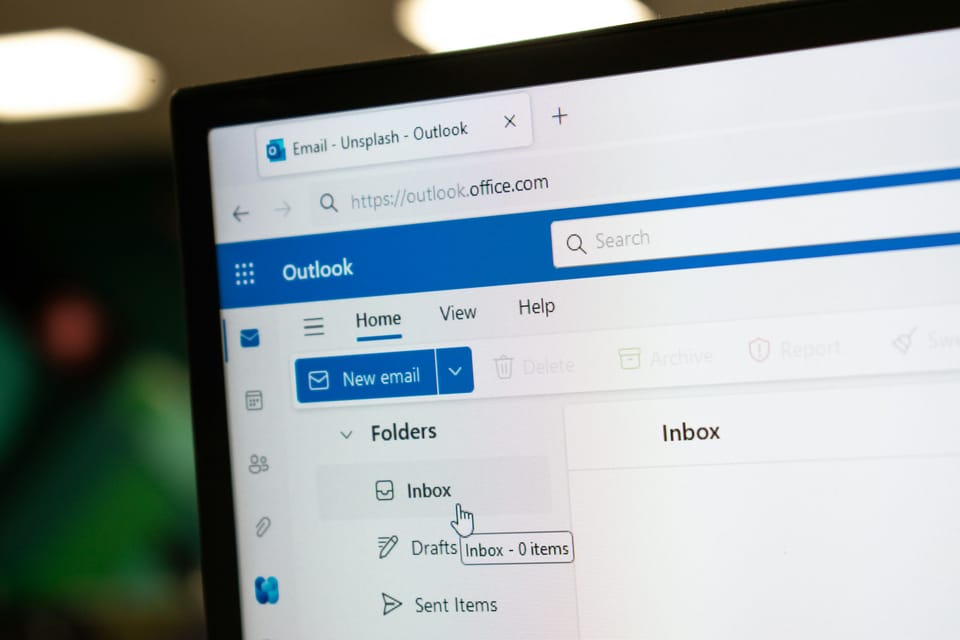
Go to Office 365 Exchange Admin Center and log in with your credentials.
- Navigate to Mail Flow
In the Exchange Admin Center, go to Mail flow > Connectors.

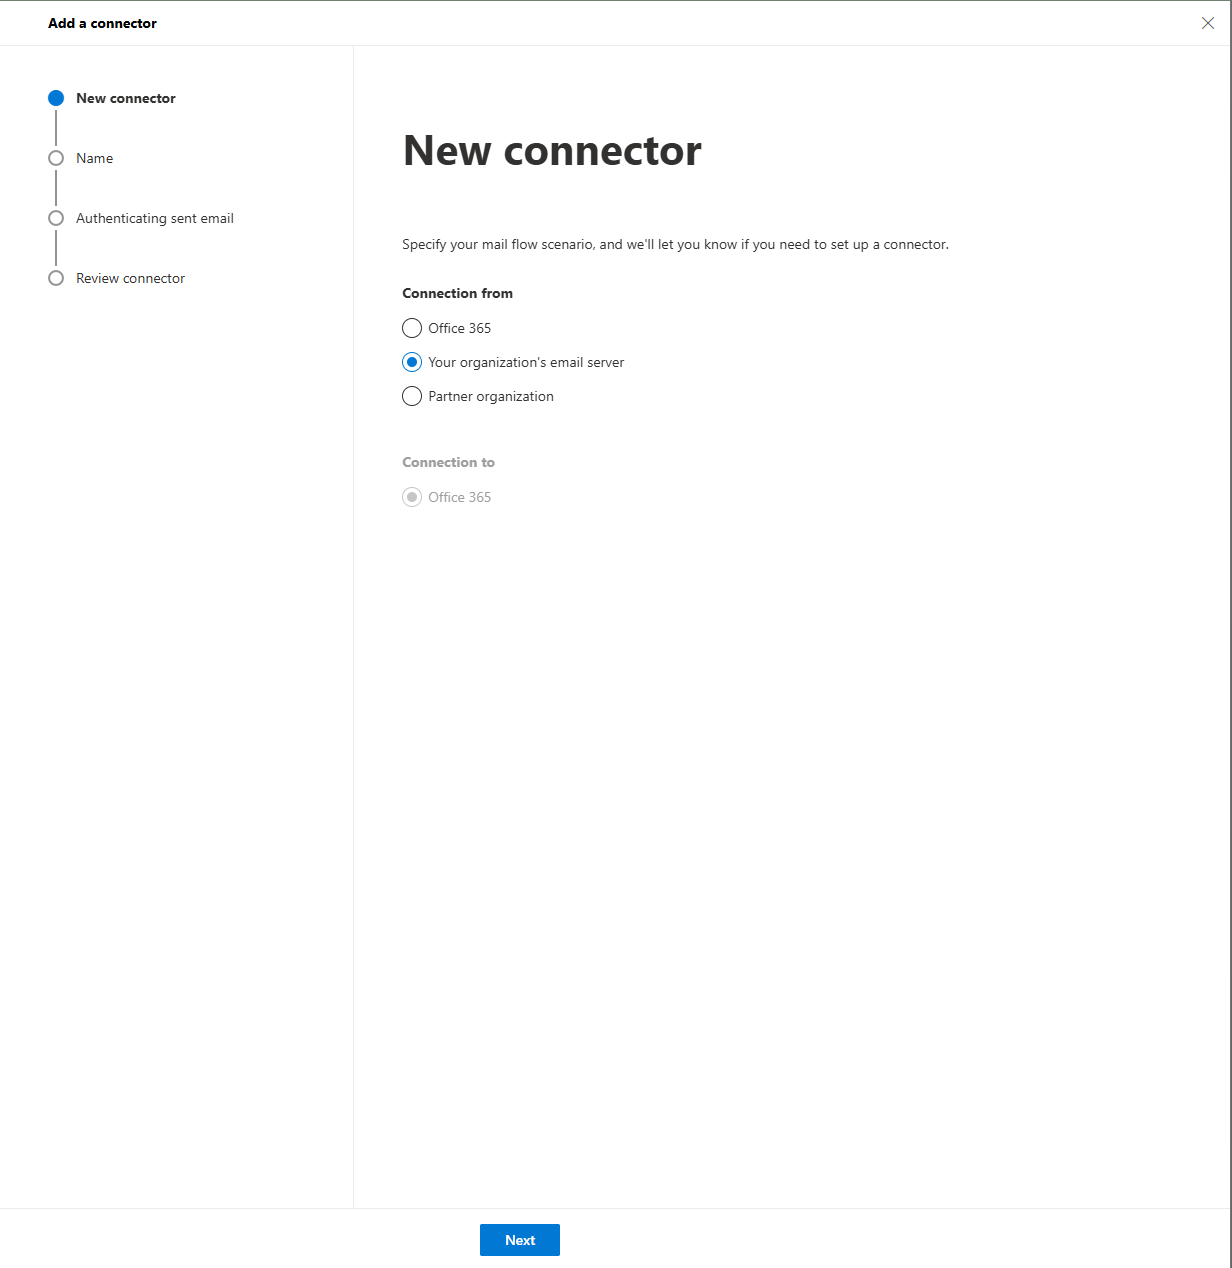
- Add a New Connector
Click on + Add connector to create a new connection.
- Configure the Connection
- For Connection from, select your organization’s mail server.
- Click Next.
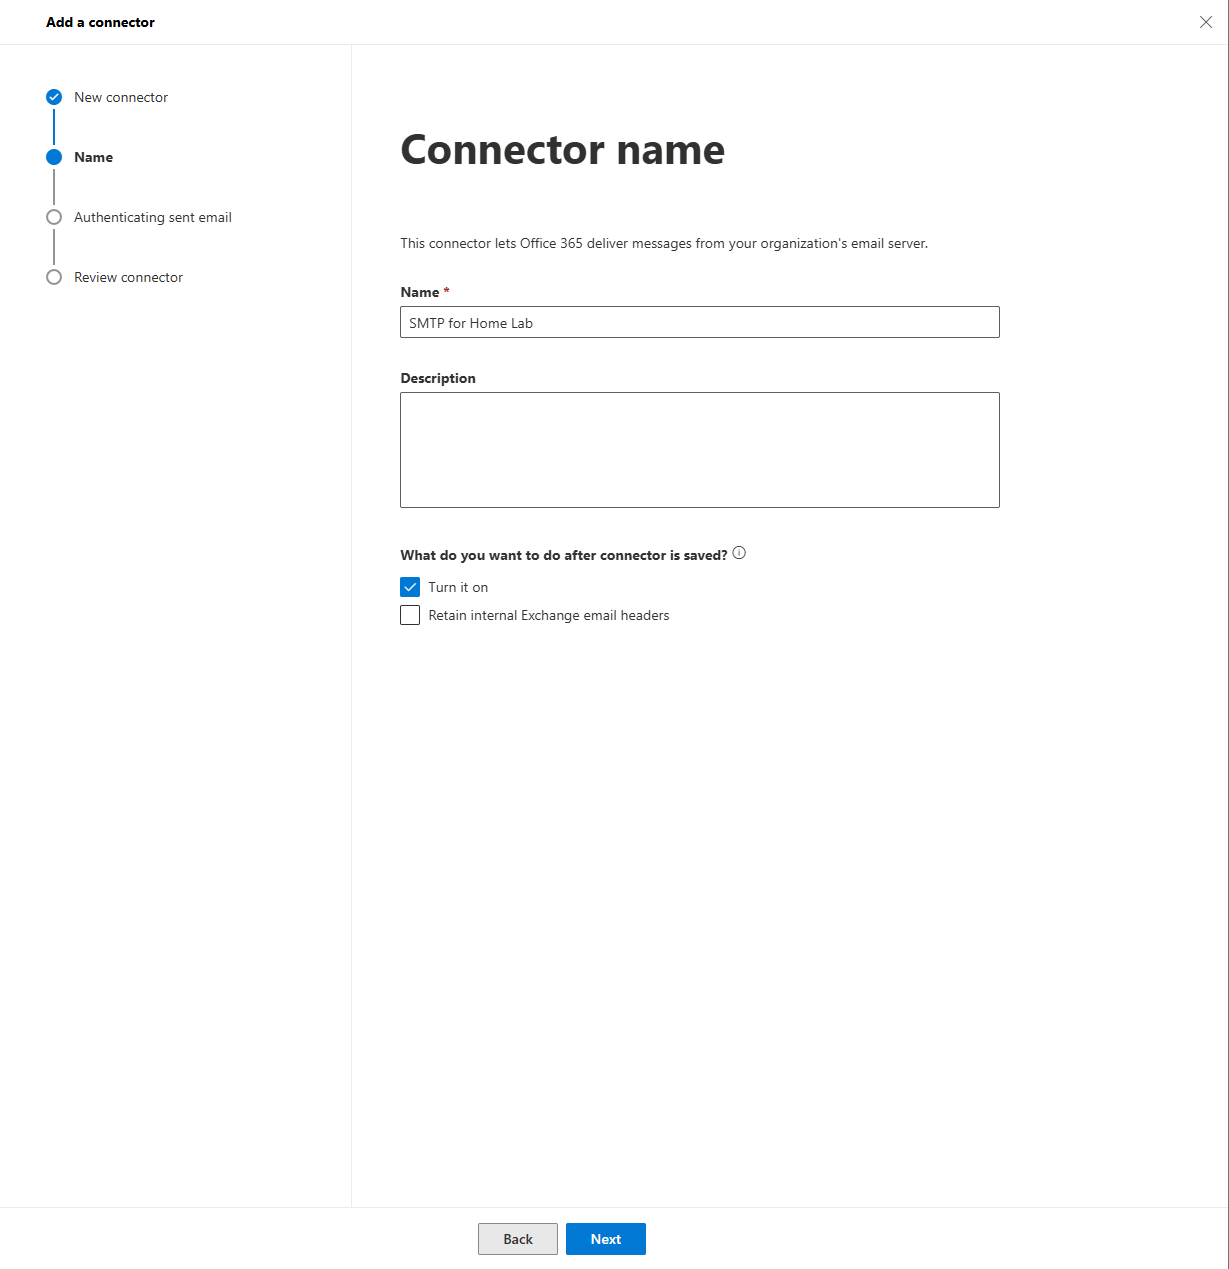
- Name Your Connector
- Name it something like “SMTP for Homelab” (you can choose any name you prefer).
- Add a description (this can be anything that helps you identify the connector later).
- Set Up Authentication
- For Authenticating sent email, select By verifying IP address.
- Enter your public IP address in the field provided.
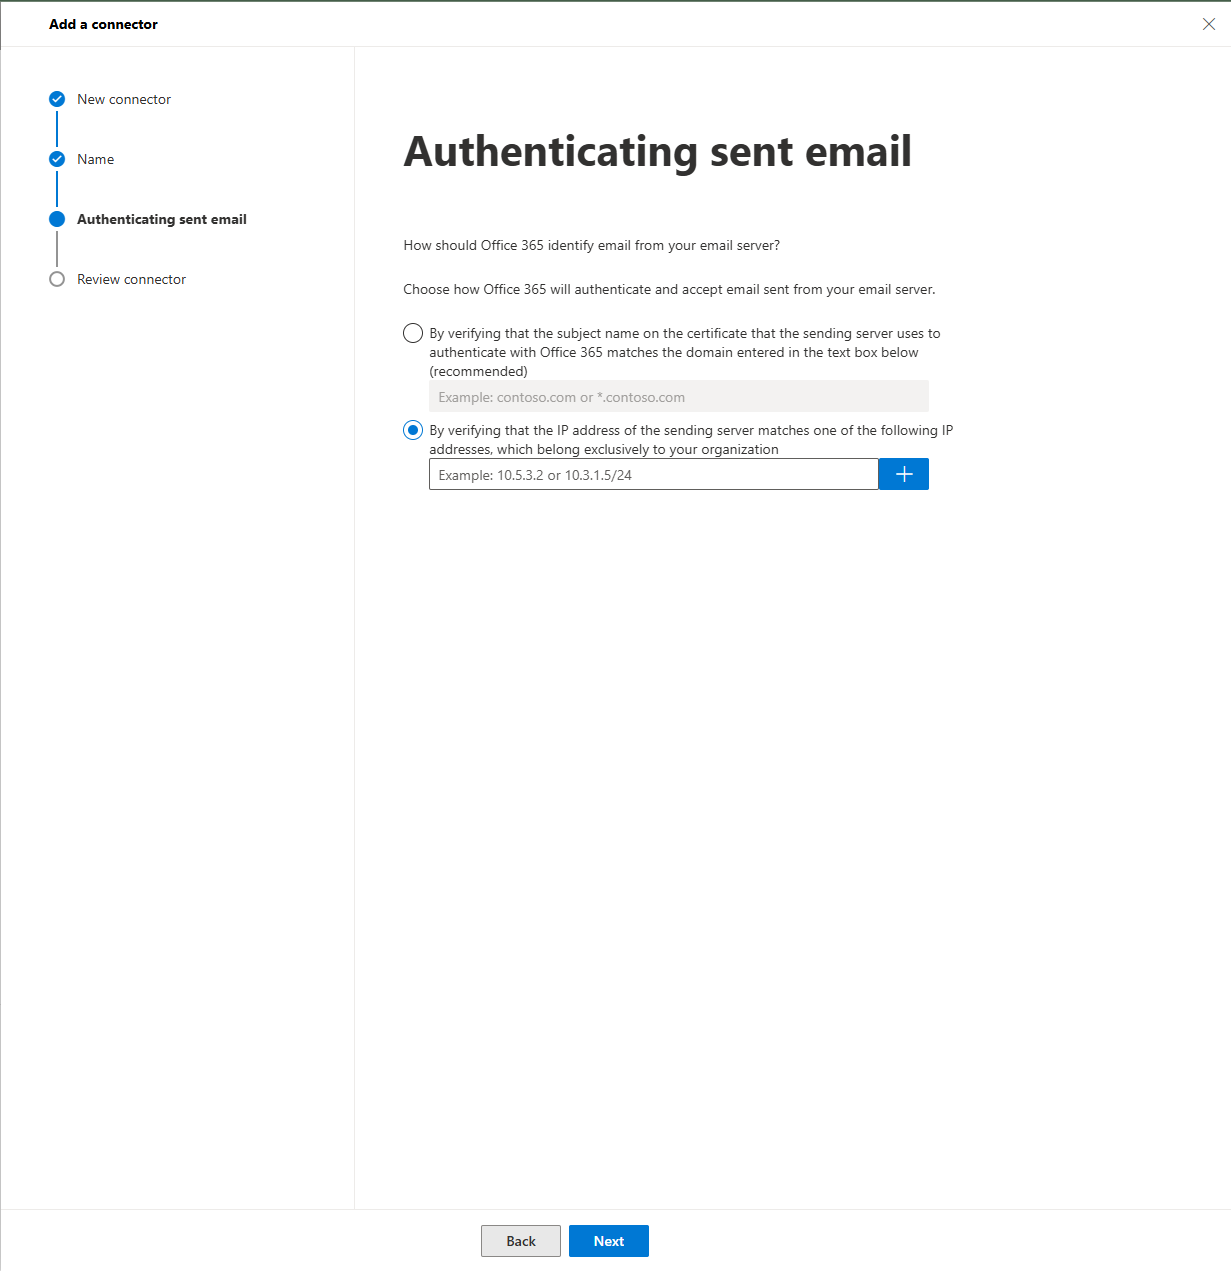
Find Your Public IP
To find your public IP address, search for "What is my IP" in your web browser. or go here https://ipchicken.com/
- Put in your Public IP and then click the Plus (+) button to add it.
Finish the Setup
- After adding your IP, click Next to review your settings.
- Verify that everything is correct, then click Create Connector to finalize the setup.
That’s it! You should now have SMTP set up and working for sending emails through your Office 365 account.
Here is STMP info that you will use.
SMTP INFO
 mail__transport: SMTP
      mail__options__host: smtp.office365.com
      mail__options__port: 587
      mail__options__auth__user: [email protected]
      mail__options__auth__pass: Password
Setting Up SMTP for Sending Email via Office 365 in Your Homelab
#Homelab #Guides #Office365
Member discussion